Written By: Michiel Froling
Last Updated on July 1, 2024
1.1 Connect AirHub to DJI Pilot 2 cloud api
To establish the connection between the AirHub platform and the DJI Pilot 2 Cloud API, please follow the steps outlined below. Completing this step first is crucial, as it ensures that your drone and battery are automatically added to your workspace.
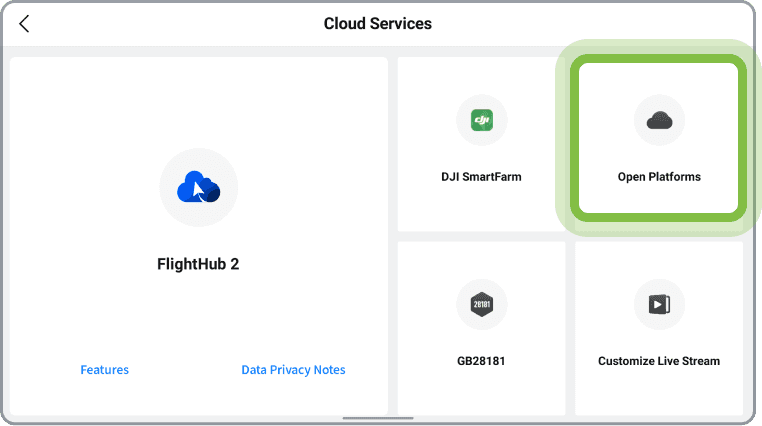
1. Open the DJI Pilot 2 app and press the Cloud Service tile.
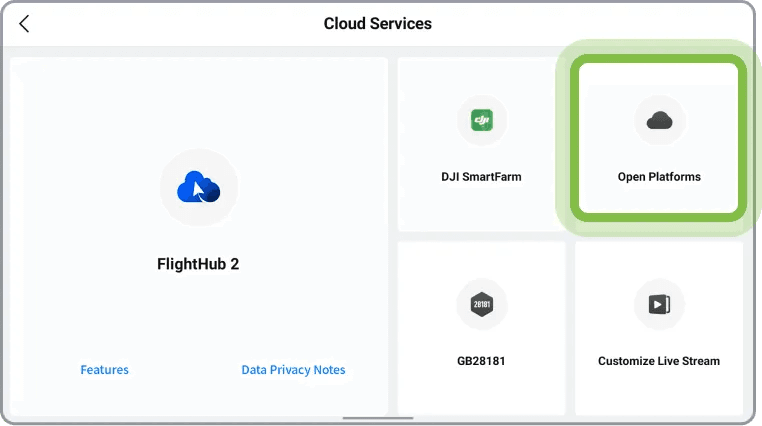
2. Press open platform tile
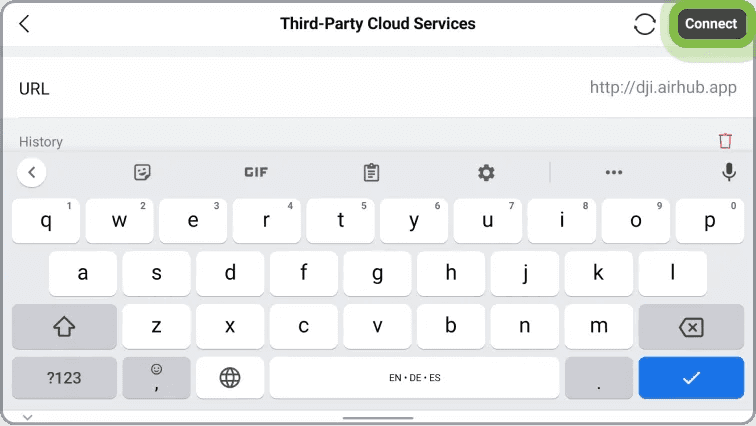
3. Enter the url: http://dji.airhub.app and press Connect
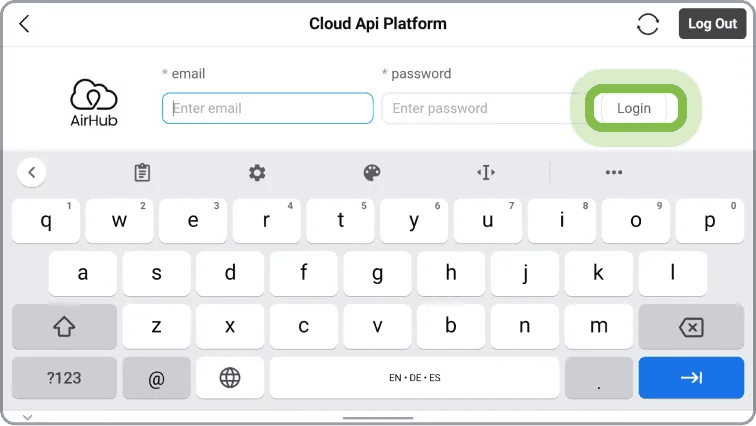
4. Login with your AirHub credentials.
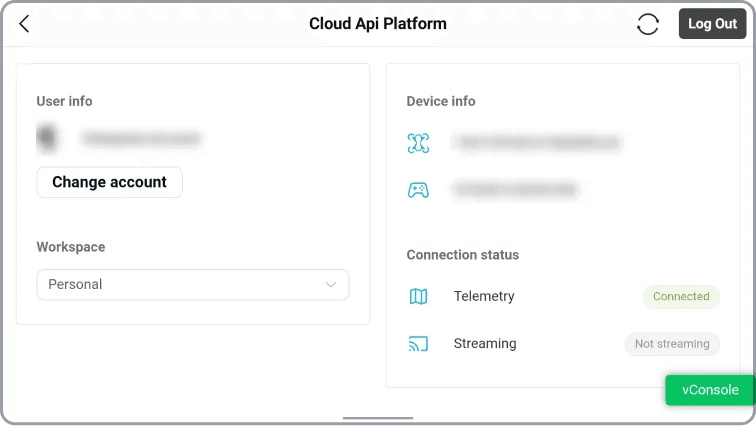
5. Once logged in, you’ll see a page with your account credentials, the workspace you’re in, information about the drone and controller, and the status of the livestream.
1.2 Choose workspace
Selecting the right workspace is crucial for successfully executing your mission, as it directly impacts the livestream and telemetry of your operations. Follow the steps below to learn how to choose the workspace.
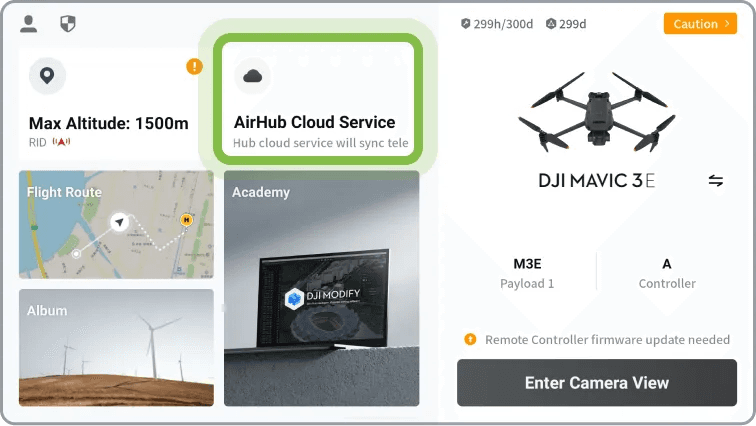
1. Open the DJI Pilot 2 app and press the AirHub Cloud Service tile.
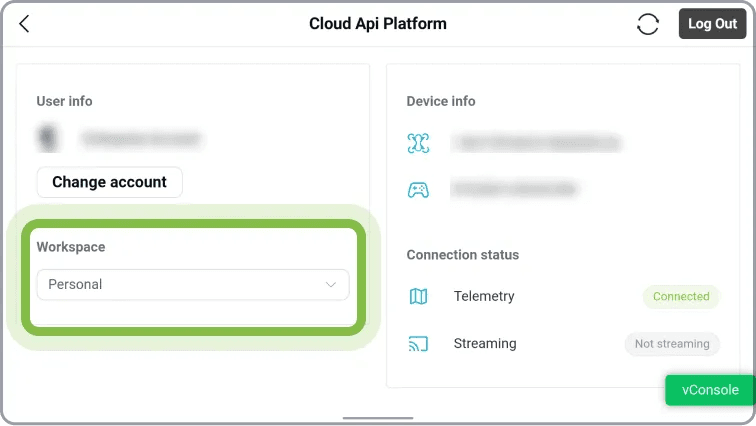
2. Press the workspace dropdown.

3. Select the workspace from the list
1.3 Executing the mission
To track, livestream and send telemetry to the AirHub Drone Operations Center while using the DJI Pilot 2 app, follow these steps.
IMPORTANT: Make sure you have selected the same workspace for both the DJI Pilot 2 Cloud Service and the AirHub Ground control app.
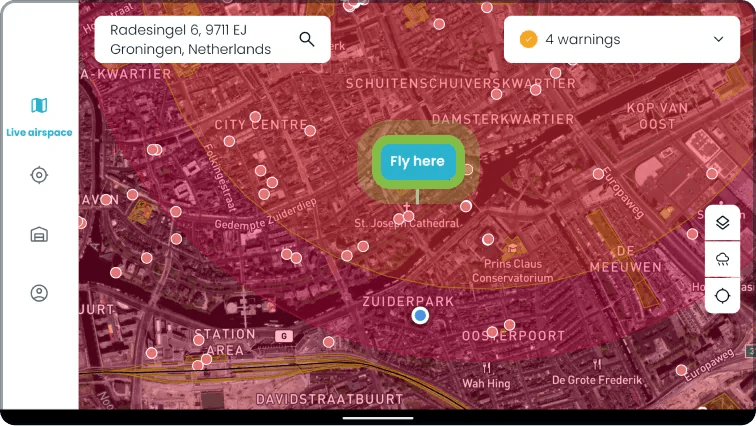
1. Create a mission by pressing Fly here

2. Press Start flight. Note: drone and battery will be added automatically.
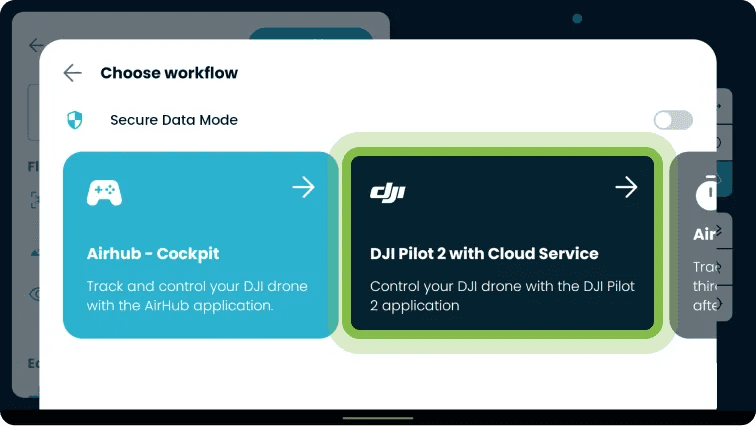
3. Choose AirHub – DJI Pilot 2 with Cloud Service Note: The DJI cloud connection doesn’t work with secure date mode.
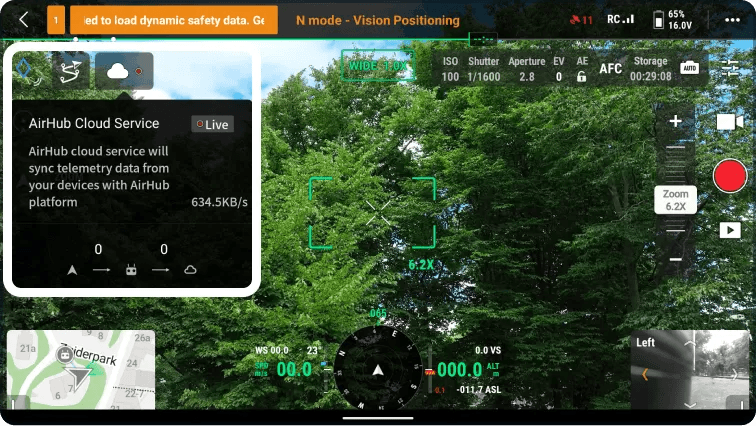
4. You can check the connection status by looking at the cloud icon in the top left corner in the camera view of the DJI Pilot 2 application.