Written By: Michiel Froling
Last Updated on March 16, 2024
Drones
Drone Operation Center
Adding drones to your library is helpful for multiple reasons. It’ll give you a clear overview of which drones are present within the organization, provide clarity on drones due for maintenance, and enable you to track where each drone has flown, among other benefits. On this page, you will learn how to add new drones and how to edit existing ones.
Add New Drones to your Library
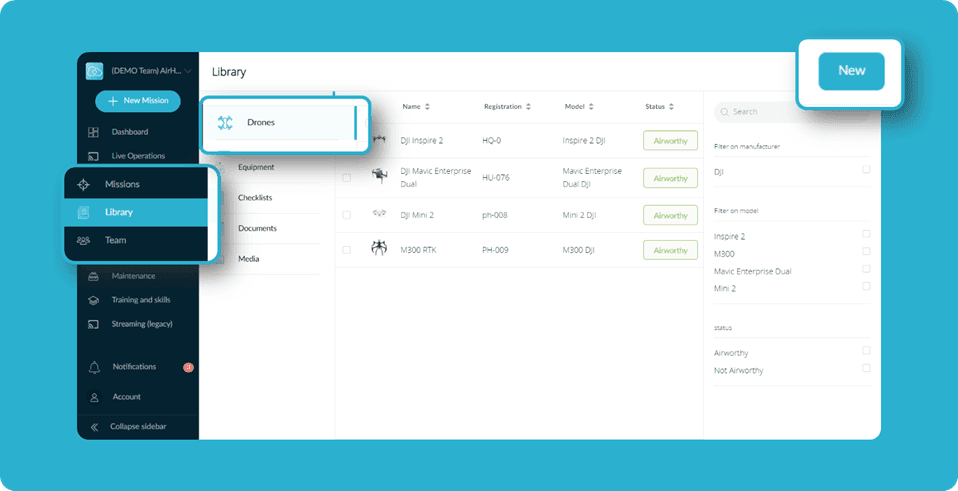
In the bar on the left side of the screen, you’ll see ‘Library’ as one of the options. Click on this.
Navigate to ‘Drones’ in the bar on the left.
To add a new drone, click on the blue button ‘New’ in the upper right corner.
A screen will open, asking you to fill in the required information.
Add a picture (optional)
Add a name (mandatory)
Add the manufacturer (optional)
Add the model (optional)
Add the registration (optional)
Add the serial number (mandatory)
Add the firmware version (optional)
Add the weight of the drone (optional)
Always make sure to click on save!
The drone will automatically be added to the overview. Go to the next explanation to learn how to edit or delete your drones.
Edit your Drones
Click on the drone you’d like to edit or delete.
In the upper right corner (next to the map), you’ll see three diagonal dots. Click on this.
To edit the drone, click on ‘Edit’ and change the information. Always make sure to click on save!
Drone Information
It’s possible to see multiple types of information specifically for a drone.
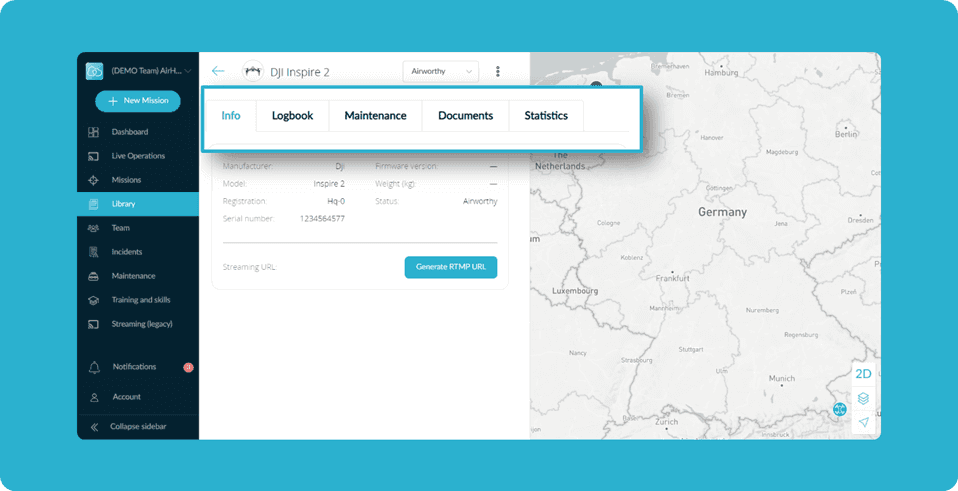
Click on the drone you’d like to see the information for. It’ll automatically land on the tab ‘Info.’
In order to see different information about the drone, like its details, logbook, maintenance, documents, and statistics, click on the tab to view the respective information.
Check the status to determine if it’s airworthy or not. This depends on whether it’s involved in an incident or a maintenance action. If the maintenance action is overdue, then the status will change to not airworthy, and you cannot use this drone in your flight plan.
Ground Control IOS App
Add New Drones to your Library

When you open the app, you’ll see the option ‘Library’ at the bottom. Click on this.
Click on ‘Drones’
An overview of all your drones will open. If you haven’t added any drones yet, this overview will be empty. Click on the ‘+’ icon in the upper right corner.
A new window will open requesting you to fill in the necessary information:
Enter Name
Enter Manufacturer
Enter Model
Enter Registration number
Enter Serial number
Enter Firmware version
Enter Weight (kg)
Always make sure to click on save.
Ground Control Android App
Add New Drones to your Personal Library
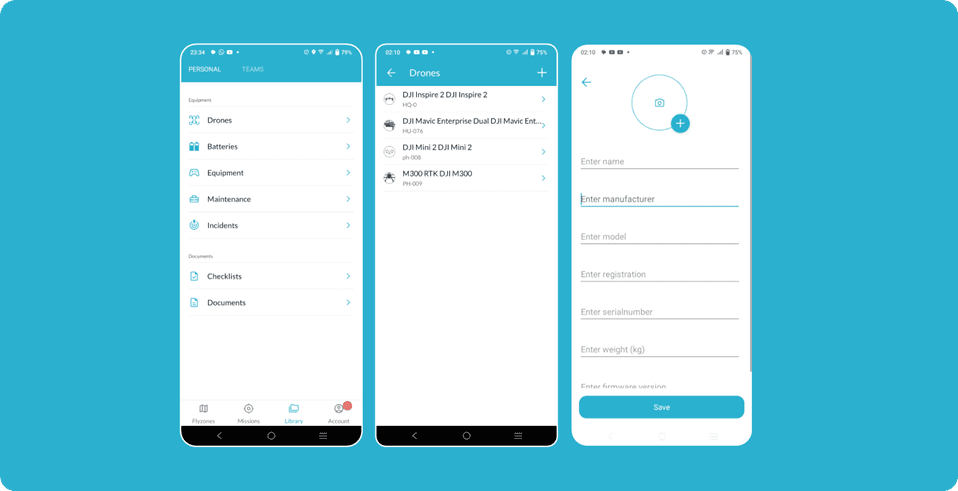
When you open the app, you’ll see the option ‘Library’ at the bottom. Click on this.
Click on ‘Drones’
An overview of all your drones will open. If you haven’t added any drones yet, this overview will be empty. Click on the ‘+’ icon in the upper right corner.
A new window will open requesting you to fill in the necessary information:
Enter Name
Enter Manufacturer
Enter Model
Enter Registration number
Enter Serial number
Enter Firmware version
Enter Weight (kg)
Always make sure to click on save
Add new Drones to your Team’s Library

Go to the Library and switch the tab to Teams from the top of the screen. This will display all the teams you are part of.
Select the team you want to see the equipment of.
This will display all the tabs in accordance with the selected team.
Select Drones from the list
An overview of all your drones will open. Click on the ‘+’ icon in the upper right corner.
A new window will open requesting you to fill in the necessary information:
Enter Name
Enter Manufacturer
Enter Model
Enter Registration number
Enter Serial number
Enter Firmware version
Enter Weight (kg)
Always make sure to click on save
Edit a Drone
Go to the drone you’d like to edit.
To edit the drone, click on the drone.
Click on the pencil in the upper right corner and edit the information.
Make sure to click on save.