Written By: Scott de Jong
Connecting a DJI Dock
1.1 Overview
Before you begin, ensure that your DJI Dock is properly installed and configured according to the official DJI setup manual, and that it has a stable internet connection.
This guide walks you through linking your DJI Dock to your AirHub organisation so that it can perform automated missions, stream live video, and share telemetry data with your team.
1.2 Preparation
Before setup, verify the following:
The dock is installed, powered on, and connected to the internet.
You have valid AirHub credentials and are a member of the correct Team Workspace within your organisation.
1.3 Log in to AirHub
Open the AirHub Dashboard and log in with your account credentials.
In the upper-left corner, select the correct organisation from the dropdown list.
Choose the Team Workspace where the dock will be added.
Go to Assets → Ground Stations.
Note; Ground Stations can only be added to one team.
1.4 Add a New Dock
Click Add New Dock in the top-right corner.
A configuration panel will open with the required connection details.
A tab will open with the following fields:
MQTT Gateway Address: The MQTT URL provided by AirHub. (tcp://emqx.airhub.app)
Password: Click to generate a password in this section. This also functions as the binding code.
Org-ID: This is the organisation ID associated with your AirHub account to link the dock to the correct team.
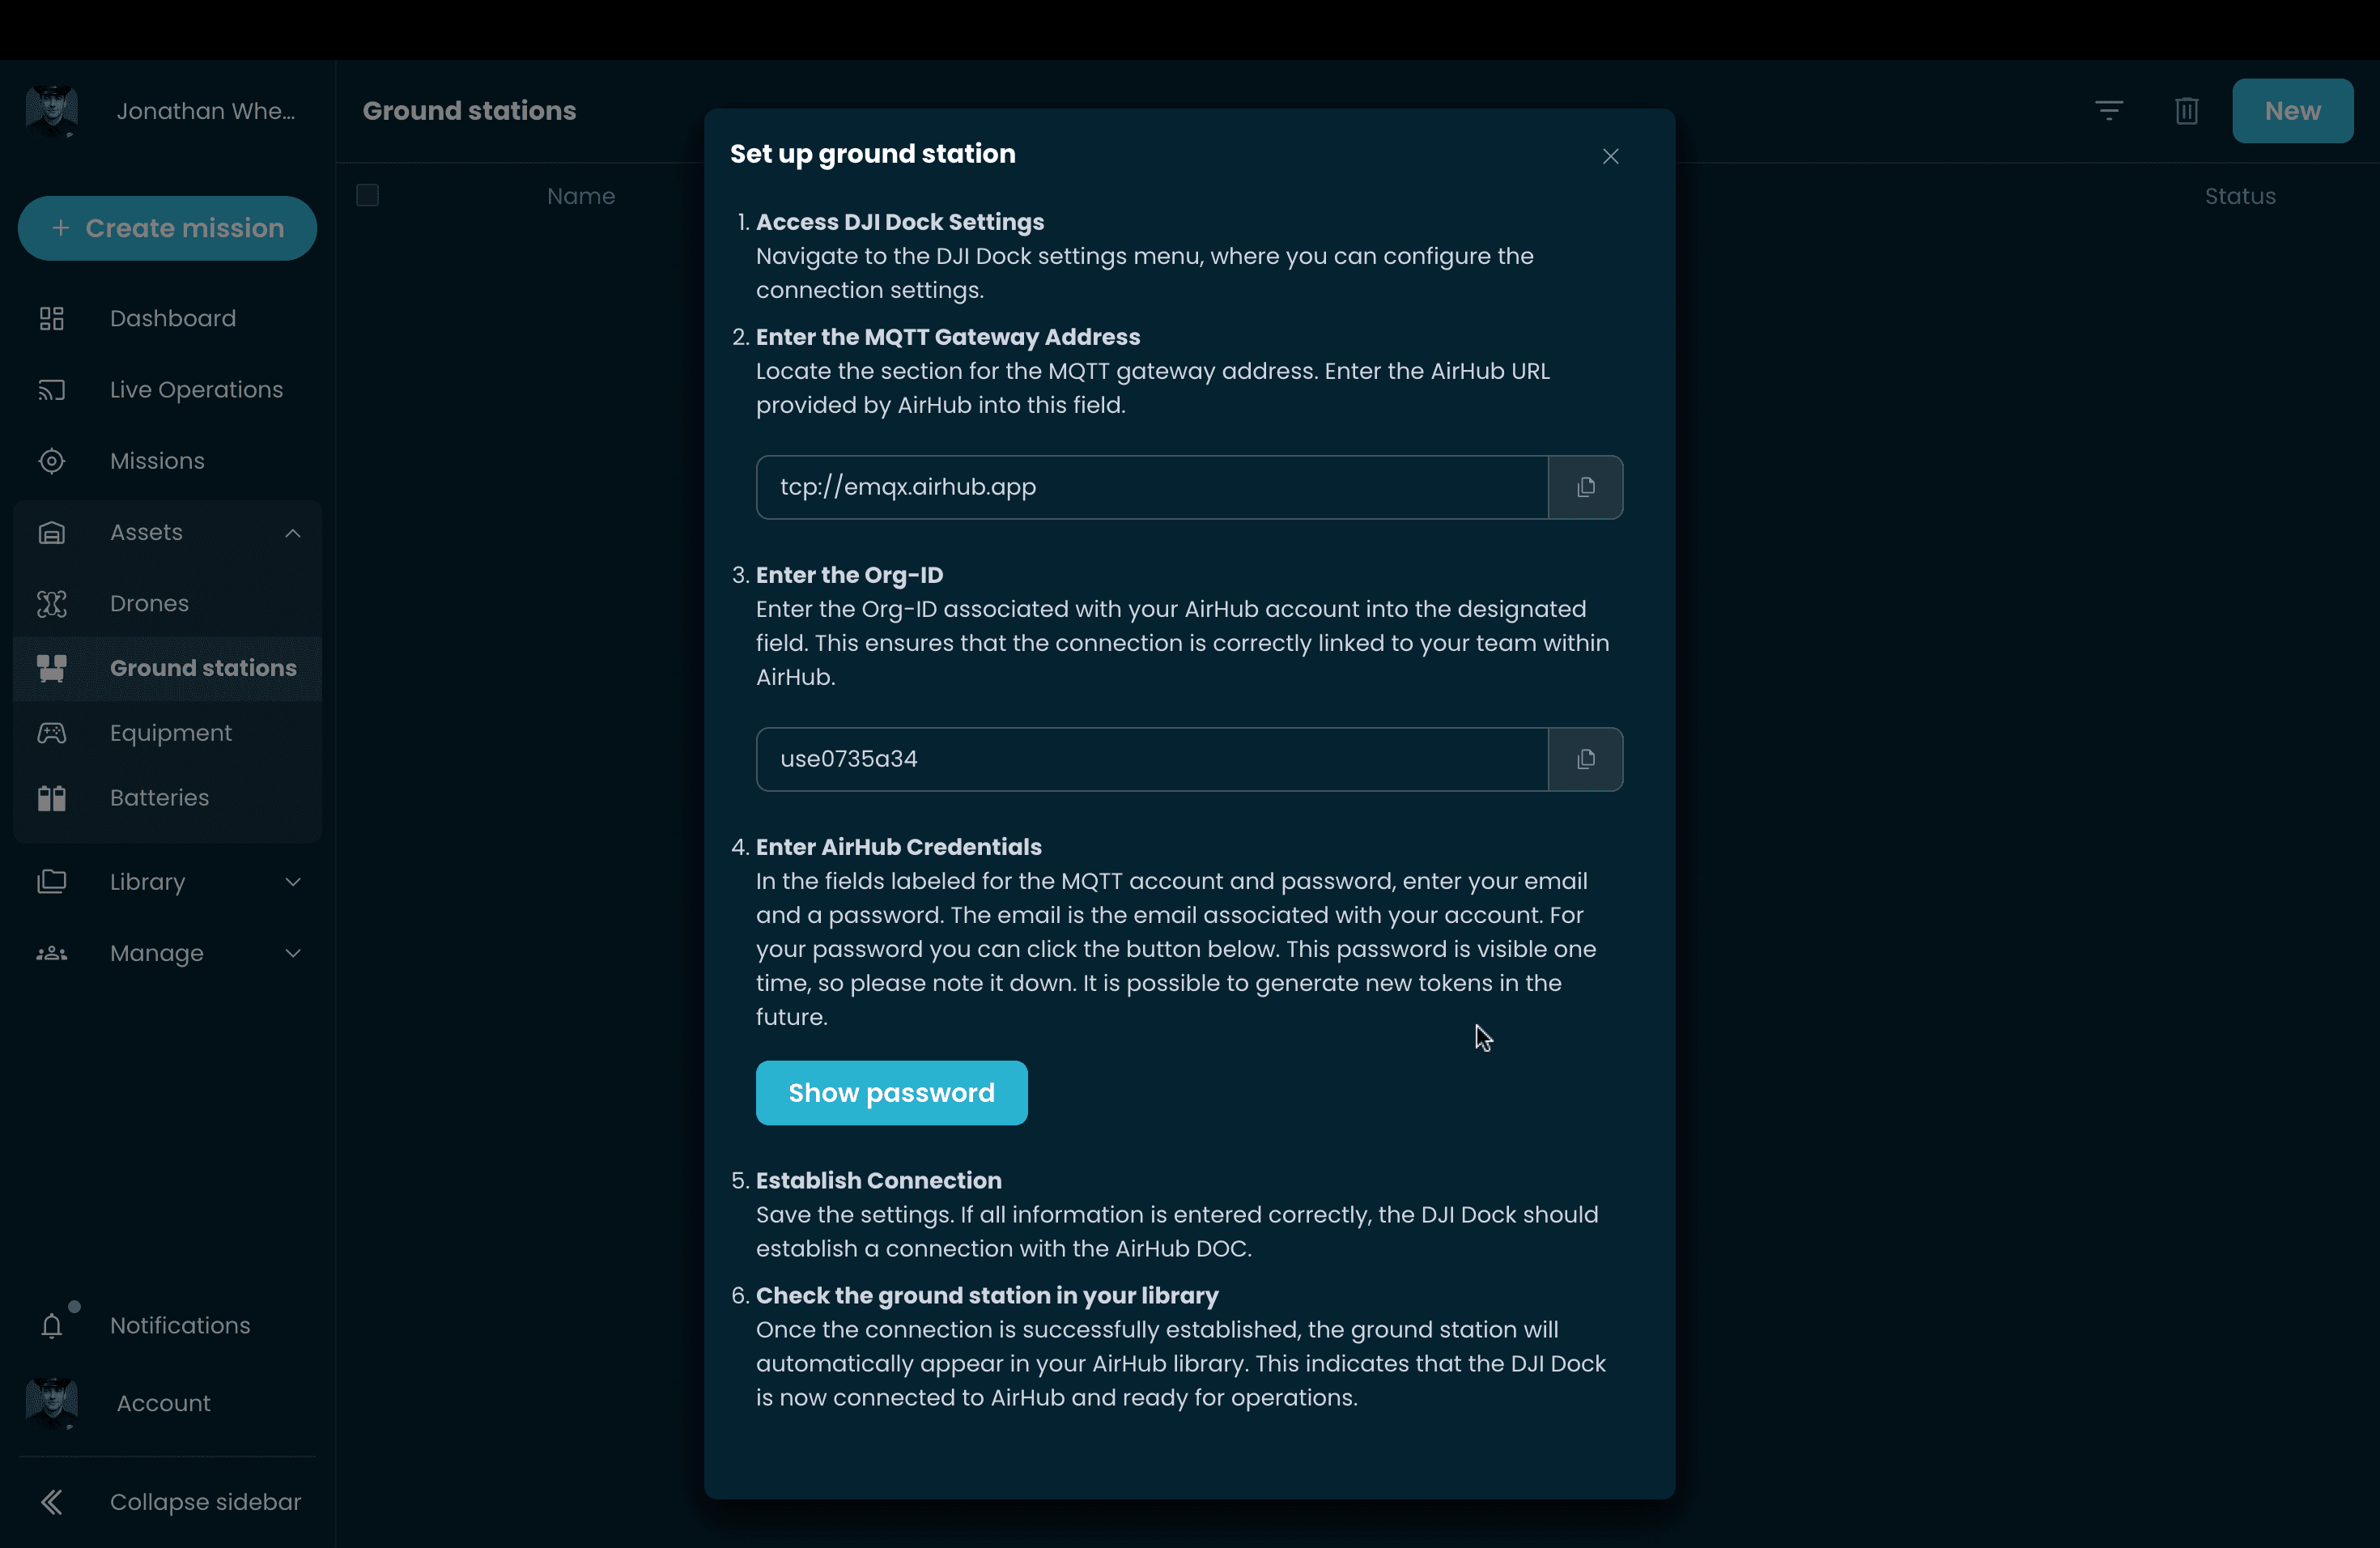
Tip; Save the Org-ID and the Password. This way you can connect the dock again at a later stage.
1.5 Configure the Dock on Location
Go to the physical location of the dock.
Connect a controller (Dock 2) or phone (Dock 3) to the dock.
Dock 2: The DJI Pilot app will automatically launch in debug mode.
Dock 3: Manually open the DJI Enterprise App, which can be downloaded at DJI Enterprise App Download.
Enter Debug Mode → Third Party Cloud Servers.
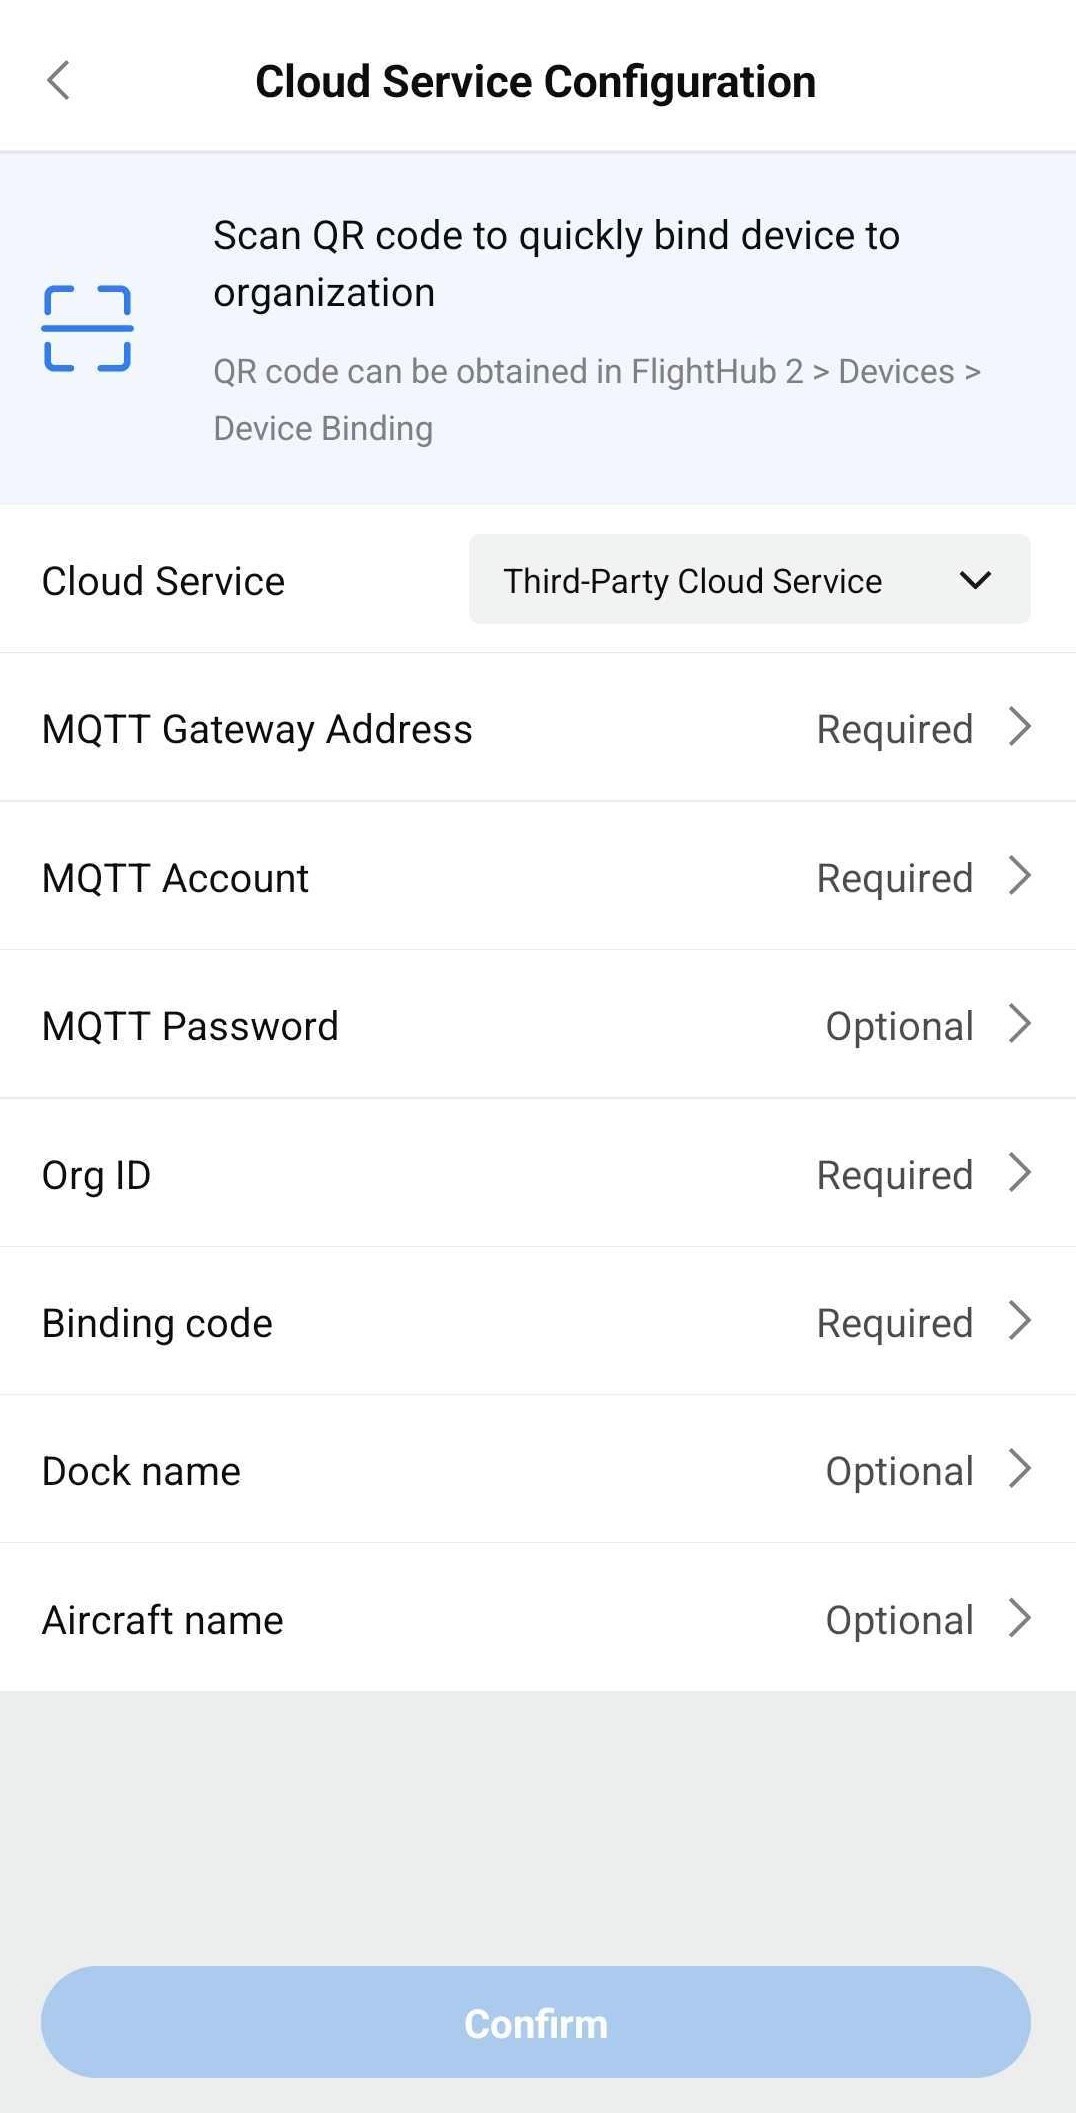
- For DJI Dock 2; After connecting the controller to the dock using a USB cable, you are in the 'Dock Onsite Debugging' tab. You should see 'Not logged in to cloud service', press on it to go to the 'Cloud Service Configuration'.
If you are reconfiguring an already installed Dock, your team name will appear instead of the 'Not logged in to cloud service'.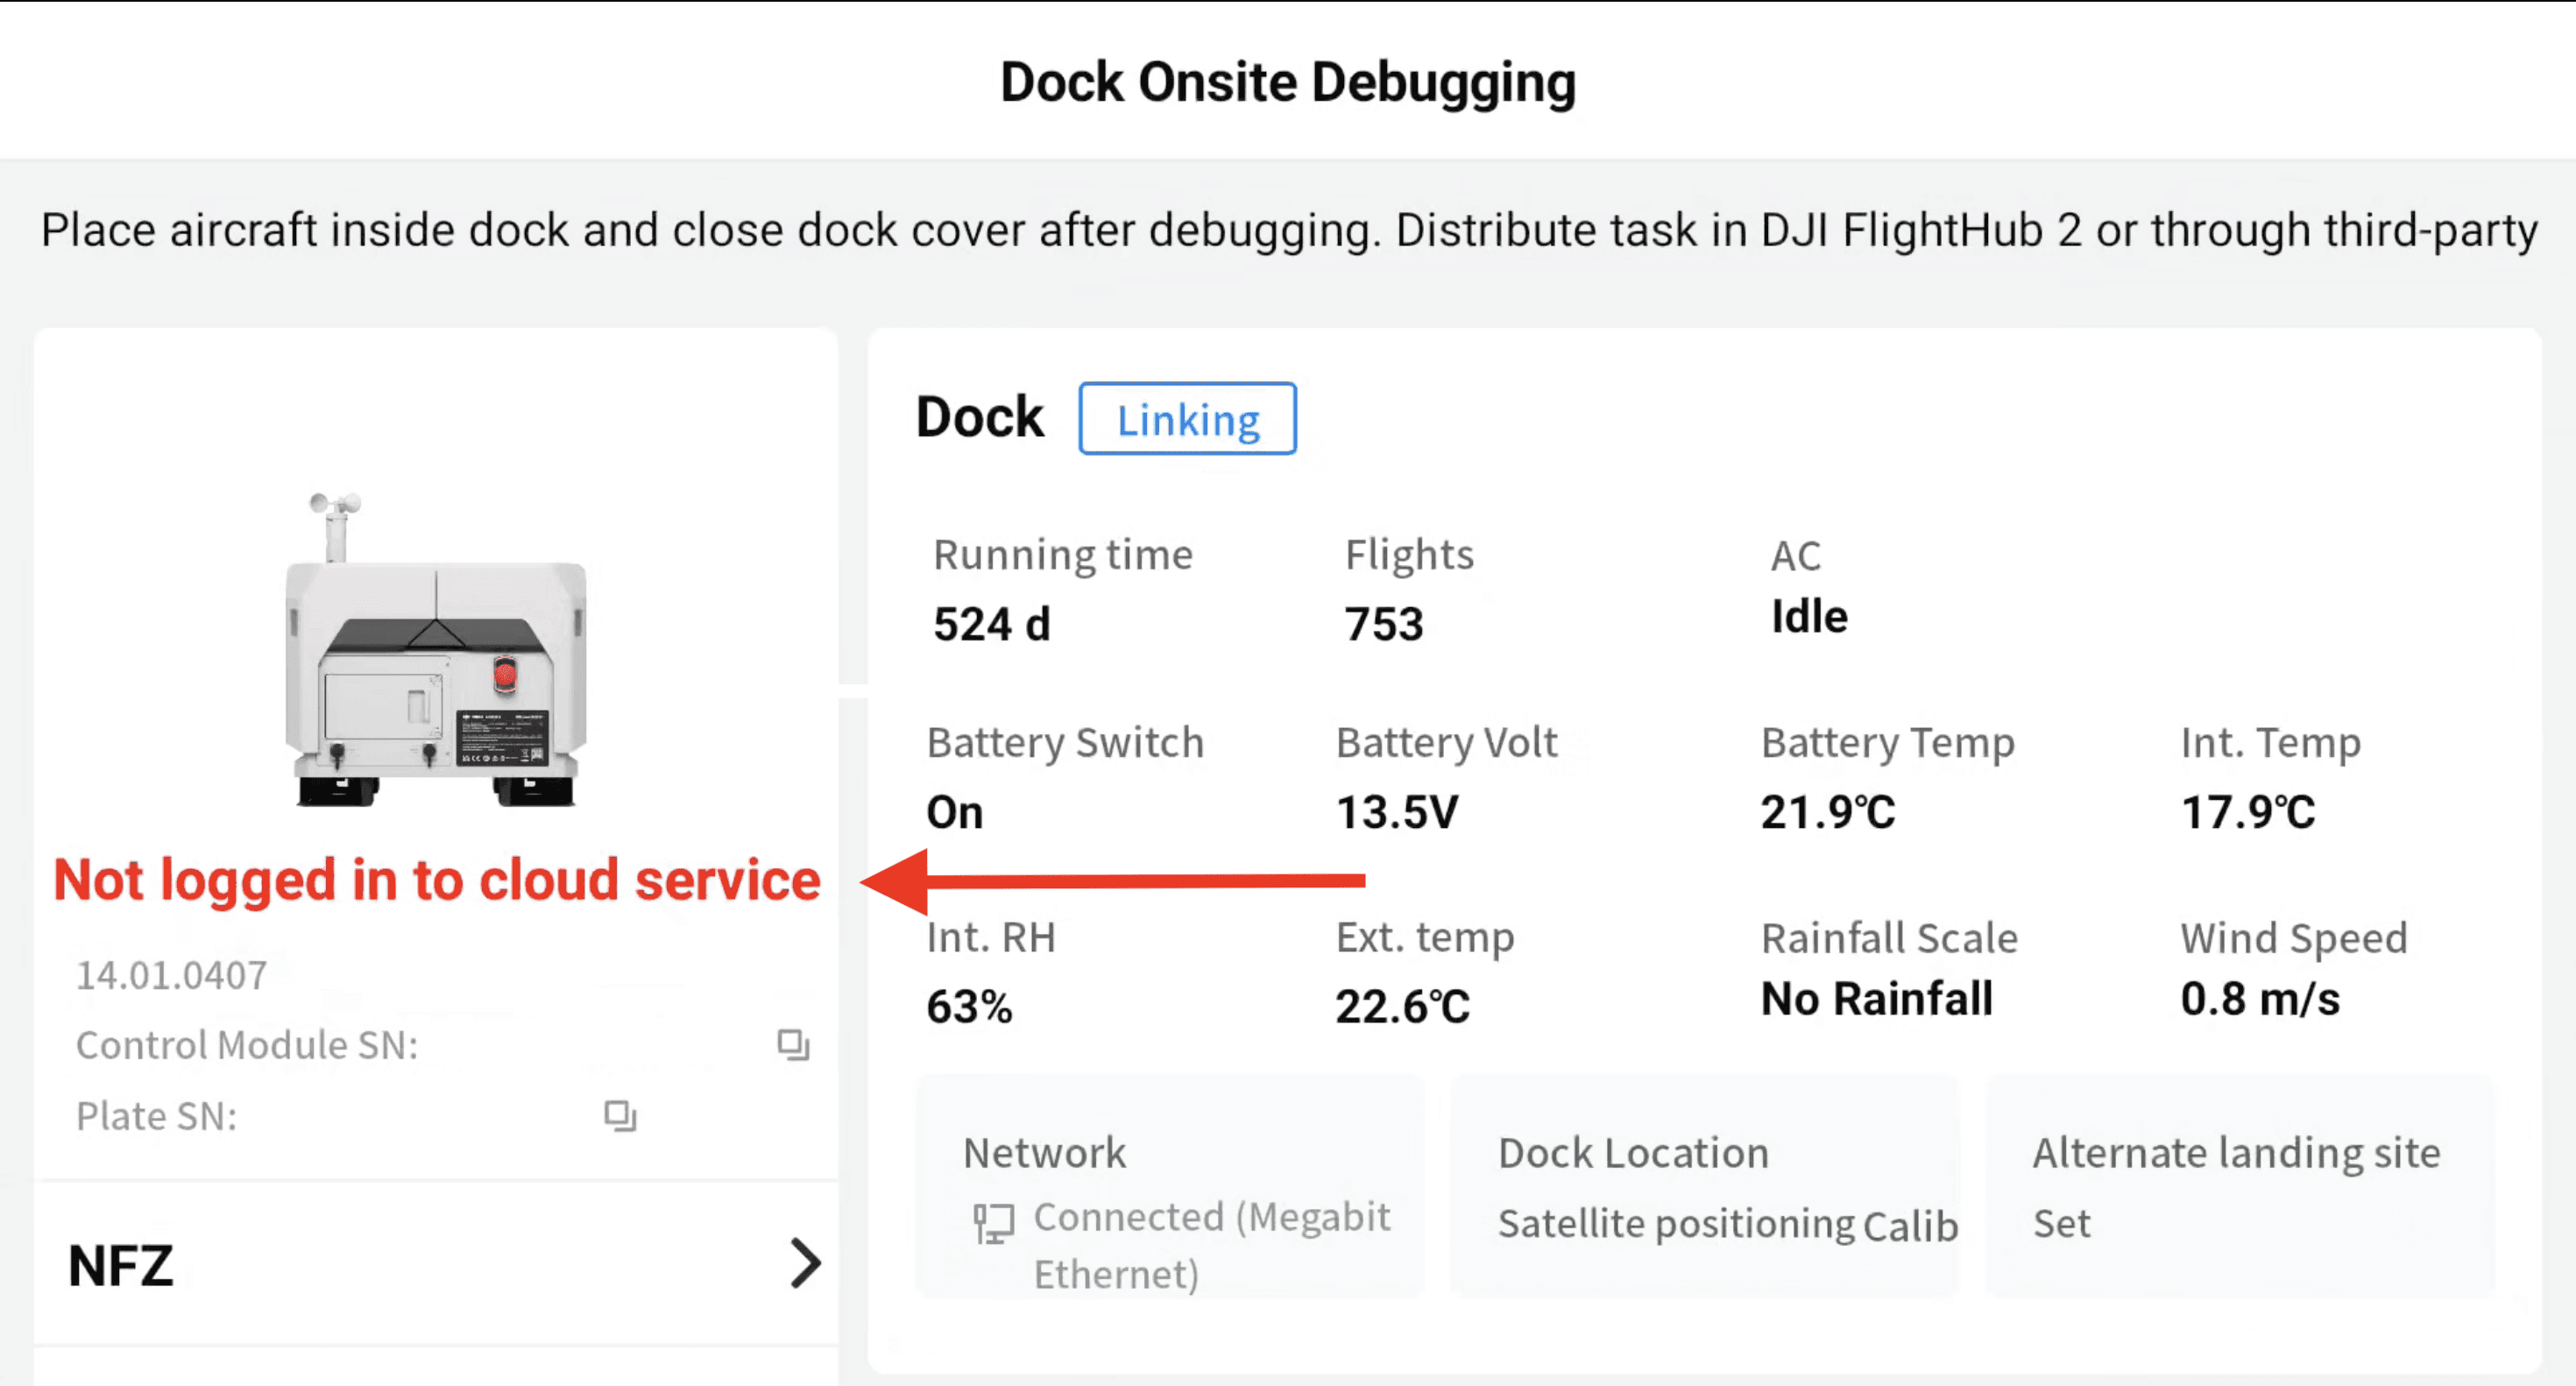
- For DJI Dock 3; From the DJI Enterprise app, after connecting to the Dock using a USB cable, scroll to the bottom and press the wrench/screwdriver button in the lower-right corner (1.). Then, press on the two intertwined circles, like a chain, to go to the 'Cloud Service Configuration' (2.).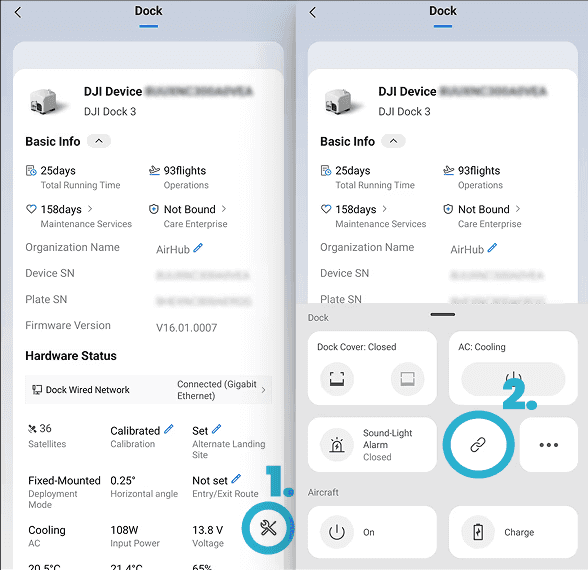
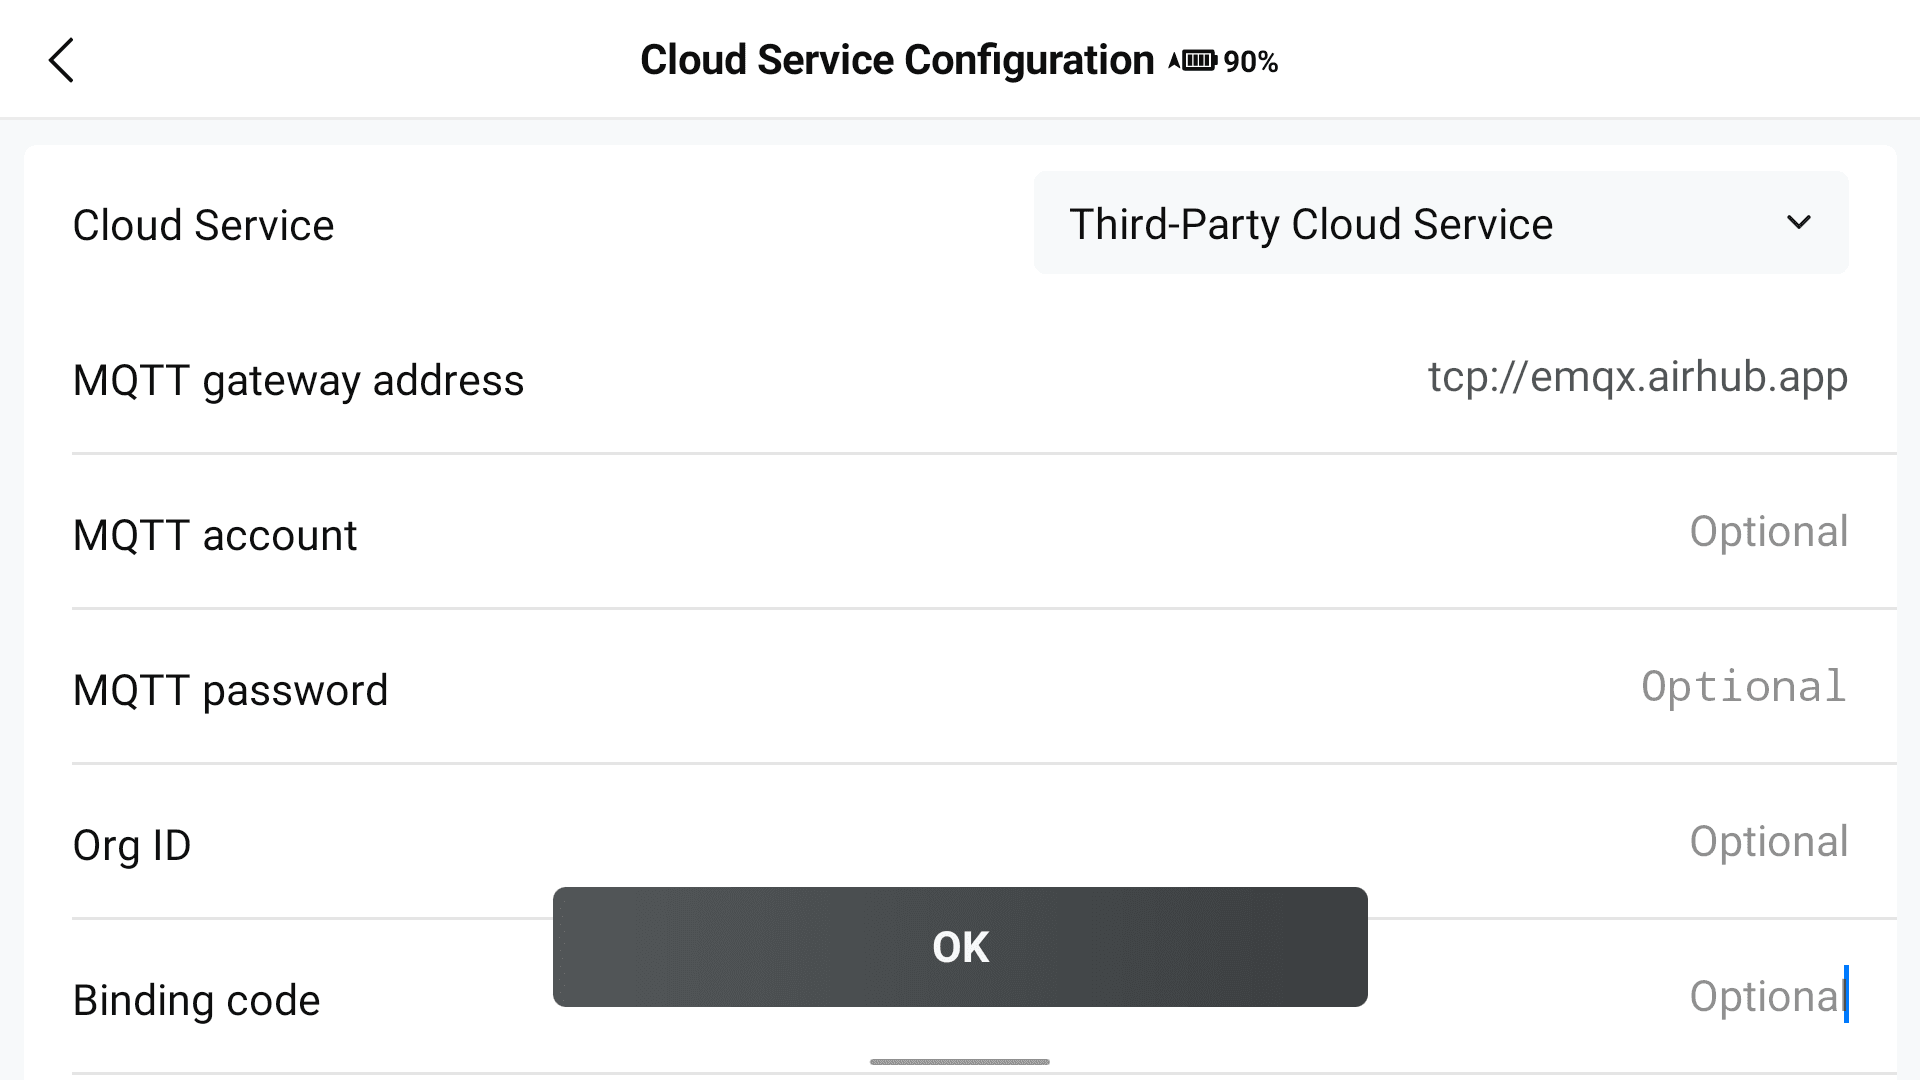
Fill in all connection details from Step 1.4:
MQTT Gateway Address
- (tcp://emqx.airhub.app)MQTT Account
- (Your AirHub account's email)Password
- (The generated password from "Set up ground station")Org-ID
- (Fill in the Org-ID from "Set up ground station")Binding Code
- (Use the generated password from "Set up ground station" again)
Confirm the setup and the dock is connected to your AirHub Team Workspace.
Dock 2 example
Dock 3 example
Note: If a DJI Dock 3 is already logged in to another third-party cloud service, you must first overwrite the existing credentials. To do this, log in to FlightHub2, log out again, and then proceed with configuring AirHub. This is not necessary with the DJI Dock 2.
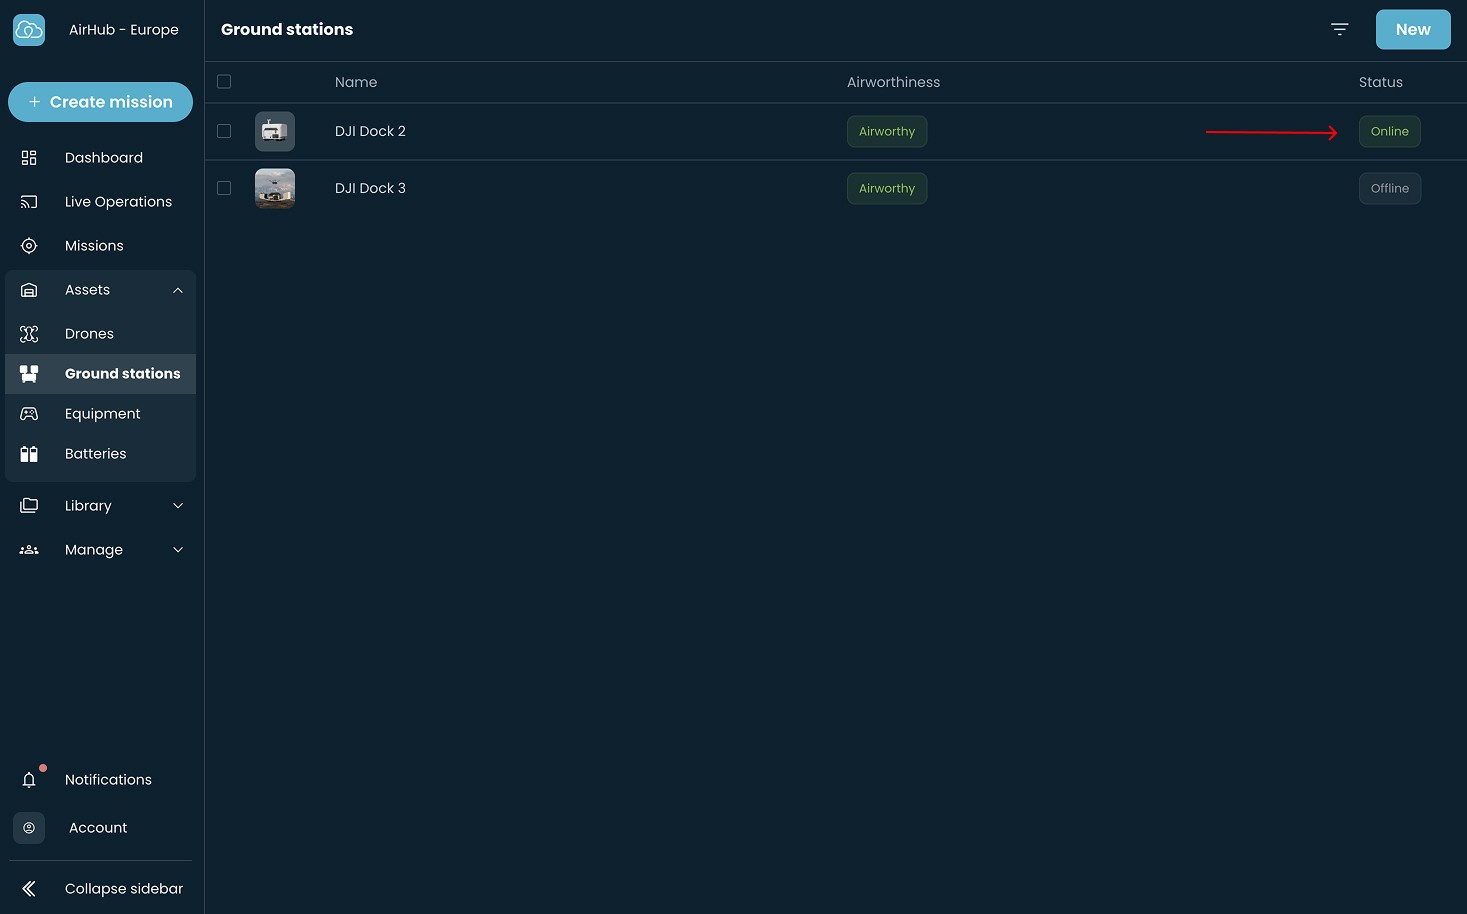
1.6 Verify the Connection
In AirHub, navigate to Assets → Ground Stations.
Confirm that the dock’s status is displayed as Online.
1.7 Final Verification
To confirm the dock is operational:
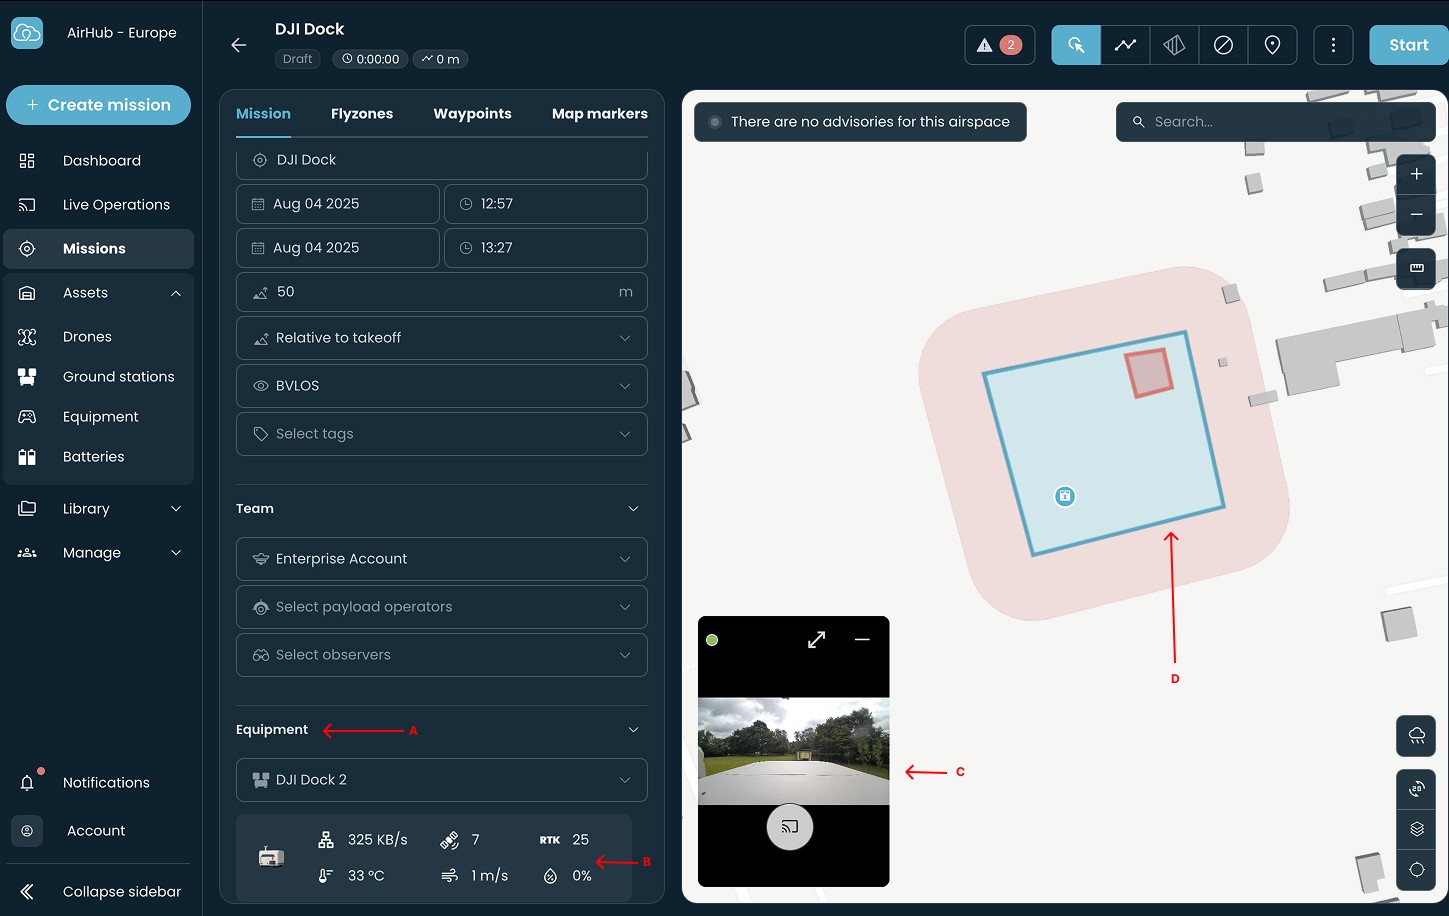
Create a New Dock Mission in AirHub.
In the flight plan:
Select the Ground Station (A).
Confirm weather data is visible from the dock (B).
Verify live camera feed is active (C).
Check that the dock appears on the map with geofence and no-fly zones displayed (D).
Start the mission and confirm that the dock executes the flight as planned.
1.8 Troubleshooting
If the dock does not connect or perform correctly:
Ensure the dock has a stable internet connection.
Confirm both the drone and dock firmware are up to date.
For live streaming, verify that streaming is enabled using the toggle under the video window.
If the connection still fails, contact AirHub Support for assistance.
Related articles