Written By: Scott de Jong
Creating and Managing a Custom Session
1.1 DOC – Custom Sessions
Before you start:
A Custom Session in the Drone Operations Center (DOC) allows you to combine multiple live video feeds, maps, and data sources into one shared, collaborative environment.
This is especially useful for command centres, emergency response coordination, or live event monitoring where multiple stakeholders need real-time situational awareness.
You can fully customise the session, securely share access, and control exactly what each viewer sees.
1.2 Step 1: Create and Configure Your Session
This step involves creating the session itself, customising its public view, and setting up secure shareable links for external viewers.
Create the Session
Select the desired workspace from the Workspace Switcher.
Click on Live Operations in the sidebar.
Press the plus (+) button to create a new session.
Enter a Name for your session (for example, Operation Phoenix or Main Event Monitoring).
Click Create.
Customise the Session Lobby
The lobby is the public-facing screen viewers see before entering the live view. It provides essential context for the session.
Within the session, click the Settings (gear) icon in the header.
You can customise the Name, Description, and Image (logo or banner) that will be displayed to viewers.
Save your changes once configured.
Create Shareable Links
Shareable links provide secure, view-only access to your session.
In the session header, click the Link (chain) icon.
Press + New Link.
Configure the following settings for the link:
• Name:
Gives the link an identifiable label (for example, Police Command Post or Client Live View).
• Access Code:
Adds a password (PIN) for additional security (for example, 123456).
• IP Whitelist:
Restricts access to specific IP addresses or ranges (for example, 203.0.113.10).
• Expiration Date:
Automatically disables the link after a defined date and time (for example, 2025-08-27 17:00).
• Permission to View Map:
Enables or disables access to the live map in addition to the video feeds.
Click Save to finalise the shareable link.
1.3 Step 2: Manage Live Feeds and the Common Operating Picture (COP)
This step involves adding devices to your session and controlling what your audience sees.
Add Devices
Open the Devices panel by clicking Devices in the session header.
Search for the device you want to add. Online devices are indicated by a green status icon.
Click the plus (+) button next to the device name to add it to your session.
• Its video feed and real-time location will appear in the live view.
Note: If you are in the main organisational workspace, you will see devices from all teams.
If you are in a team workspace, only that team’s devices will appear.
Direct the Audience View
As the session administrator, you can see all active feeds, but you control what your audience sees through the shared link.
Hover over a video feed to display the control buttons.
Click the Eye icon to toggle visibility:
• Visible (solid eye): Shown on the shared link.
• Hidden (crossed eye): Not visible to viewers.
This allows you to curate the live view for external audiences in real time.
1.4 Step 3: Collaborate and Analyse in Real Time
A Custom Session provides several collaboration tools designed for active mission management and rapid situational assessment.
Interactive Map
• Displays real-time device locations, flight geography (flyzones, waypoints), and any live map annotations.
• Provides shared situational awareness for all session participants.
Snapshots and Annotations
• Hover over a video feed and click the Camera icon to capture a snapshot.
• Draw or annotate directly on the image to highlight key details.
• Share annotated snapshots in the session Chat for collaborative discussion.
Cockpit View
• For supported drones, hover over a feed and click the Controller icon to open the Cockpit View.
• This displays detailed telemetry such as altitude, speed, and battery status in real time.
Pinning and Tracking
• Pin a Video Feed: Hover over a feed and click the Pin icon to enlarge it and make it the dashboard focus.
• Track a Device: Click the Track icon to make the map automatically follow that drone’s movement.
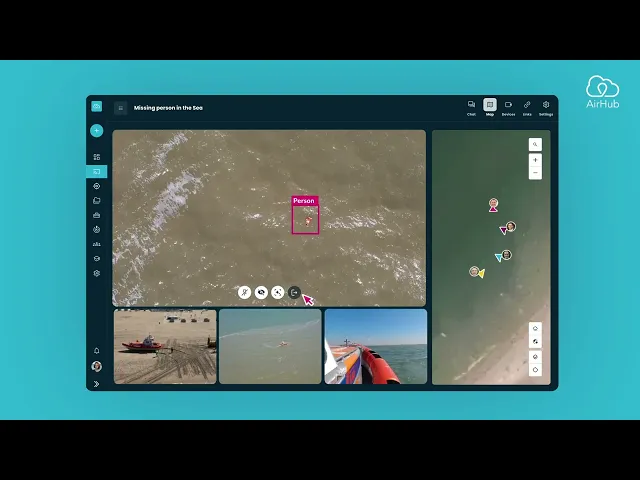
AI Object Detection
• For enabled systems, AirHub can automatically detect and highlight objects of interest such as people, vehicles, or other items.
• This helps accelerate situational awareness during time-critical operations.
1.5 Summary
Custom Sessions in AirHub allow you to coordinate multiple live feeds, manage what audiences see, and collaborate in real time. From setting up secure links to controlling live views and analysing telemetry, the feature provides a powerful tool for mission management, public safety, and professional operations.
Related articles